My friends, it’s been a long time since I’ve written. Summer is here and the bees are flying! I’ve had a lot of positive life changes that have kept me incredibly busy – keeping up with this blog is one of the things I dropped temporarily.
What’s new? A quick review
I won Best In Show for Honey at the McHenry County Fair, 2023 with my Chunk Honey!
I won 1st place in Light Extract Honey, Chunk Honey, and the Basket categories at the McHenry County Fair, 2023
My kid won Best in Show for Honey and 1st place in the Jr. Honey Art category
Both beehives grew new queens and laid successfully – one on purpose, one not!
Cut comb honey was a hit at the Honey Festival at Orchard Landing in Hanover, IL
Both hives did not make it through the winter due to weather fluctuation
I smoothly installed two new bee packages in early April. I purchased Carniolan queens again this year. Both beehives were healthy, but the queens took a long time to start laying. Last weekend, I finally observed a hive full of brood – capped and uncapped larvae, and frames full of bees.
The other hive, however, looked the same as the day I installed it. There were 3 frames of bees, fresh nectar and pollen, but no eggs or “queen sign.” It was Mother’s Day, and all of the bee supply stores were closed. My first instinct was to purchase a new queen to add to the failing hive. But, after calculating the amount of time for the hives to build up, and the fact that the other hive needed to expand, and to better my chances of winter survival, I decided to combine the hives.
I didn’t check closely for the queen in the failing hive, but I decided to take my chances. I used the “newspaper” method, laying a single sheet of newspaper with 3in slits cut throughout on top of the successful bottom brood chamber. I placed the failing brood chamber above the newspaper, and the drawn-comb super above that. I’ve dubbed this beehive “McDouble.” I used the hamburger analogy to explain the process to my husband. I didn’t need to also add the super, but there were bees in it and it was about to rain, so I added it on anyway. From what I hear, we’re about to enter a big nectar flow, so I expect the bees will quickly draw out the upper brood box, lay more eggs to expand the population, and start filling the super with honey. If not, I’ll take it off temporarily.
I also started OVP mite treatments to knock out any varroa mites that might be around. This is help the growing hive to be healthier as we go into a big honey production season. OVP is dangerous to human when the acids are temporarily vaporized. I take full protection precautions. I might look silly wearing a gas mask under my bee veil. But, I’ll take looking silly over damaging my body.
I look forward to seeing how this hive combination goes. Every year presents a new challenge in beekeeping. Combining hives is common, but this is a first for me.
Beehive update: I’m happy to report that both beehives have successful, egg-laying queens. Both now have healthy bee populations, and they continue to bring in nectar and pollen. After harvesting honey, I am allowing them to create a proper store of honey for winter.
Honey update: The main beehive had two honey supers positioned for a honey harvest. One honey super was intended for traditional extracted honey. The other honey super was fully made of beeswax (without plastic foundation), for an intended harvest of cut comb and chunk honey. Using almond extract and an escape board, the bees hardly noticed that I took their honey. I gave them two supers of drawn out comb that they could immediately refill with nectar and honey, and they busily began working on those frames.
Back inside the house, I felt rebellious. Why should I pull out the big heavy honey extractor for 7 frames of honey? That’s a lot of effort and mess. Instead, I decided to squelch and smash the honey and wax off of the comb and straight into a mesh bag. The bag hung just above the honey line in the bottling bucket. This made the process a little bit less messy, a little bit simpler, and perhaps more pure as less air was trapped in the honey. I decided it would be the perfect honey to bottle for judging at the county fair. And, that is what I ended up using it for. I bottled four pounds of honey, and saved the rest of later. These four jars were destined for honey judging. I treated them like spoiled babies.
A few days later, I processed my cut comb frames. I used a wooden ruler with marking for where I would cut the comb into squares that fit my containers. I left the scraps and odd size pieces to be used later for chunk honey. My intention was to save one honey frame in-tact to show at the fair, but I didn’t have any that were quite show-quality. So, instead I cut them all to sell as cut-comb and chunk honey.
Chunk honey is a type of jarred honey that includes both honeycomb and liquid honey. With the intention to show at the county fair, I cut four perfect sections to the exact dimensions of the comb jars, and placed those aside for special treatment. The remaining cut comb jars were less technically perfect, but still a joy to look at and equally delicious. After filling my jars with with the “chunks” I filled the jars with the liquid honey still in the bottling bucket. Chunk honey is the best of both worlds because you get lots of liquid honey, and plenty of cut comb to spread on toast, wow on a charcuterie board, use in fancy dessets, on top of yogurt, and so on.
I also ended up with a surprising number of perfect cut comb pieces to sell on their own. I placed these on cookie drying racks to allow the broken cells on the edges to drain of honey. The next day, I placed these pieces in containers to sell. Similar to above, these are wonderful to eat on their own, in recipes, and as statement pieces at parties. You can use cut comb in the same way that you use liquid honey. Beeswax is ok to eat, and you don’t notice it when it melts on toast. But, if you take a bite of honey comb, you can suck the liquid honey out and spit the wax out like a wad of gum. Or, you can swallow it – whatever you prefer. I spit out the wax in the same way I spit out a cherry pit or watermelon seeds – no problem.
This honey process lined up perfectly with the McHenry County Fair. It allowed my jars to sit for a couple of weeks to settle out any bubbles, and so on. I decided to show my extracted honey (3 uniform jars), chunk honey (3 uniform jars), and a honey gift basket. The gift basket specifications required at least one jar of honey, one wax product, and honey or wax products produced by the owner, and no more than 6 items. I included my 1 pound glass honey jar, 1 pound chunk honey jar, 1 bottle of mead, 1 beeswax candle, 1 fire-starter, and beeswax wraps. It looks amazing.
I brought my items to the McHenry County Fair yesterday. Judging was today. I will stop by after work to see whether I won anything!
As the title implies, I have drama to report. At some point in the last month, the large beehive decided that it needed a new queen. I don’t know whether the queen died naturally, was murdered by her workers, accidentally squashed by me in an inspection, or savagely executed in a takeover by a younger, stronger queen. But, about three weeks ago I found an exciting scene: a live queen, no eggs laid in at least the last 7 days, and 11 (!) queen cells in the beehive.
A queen-cell “peanut” on a frame. This egg was chosen to develop into a queen bee. Typical capped worker cells surround the queen cell.
Queen cells are the special, extra-large cells that are created for eggs selected to develop into a queen. Beekeepers call these queen cells “peanuts” because they look like a literal peanut shell hanging from the frame. Any female egg can become a queen – the difference is that the chosen egg is treated differently by being fed extra royal jelly, a large cell, and special care. So, something happened and 11 queens were concurrently in development. That sounds great, but if more than one queen hatches, the queens will battle to the death until the last queen remains – Game of Thrones style.
This was entirely unexpected. Beekeeping is an exciting challenge due to situations like this. I did create the mini-hive a few weeks prior, and its purpose is to be an emergency backup of bees, eggs, honey, and an extra queen. Thankfully, the brand new queen in the Nuc (mini-hive), is doing great! I uploaded a photo of this new queen below. She successfully started laying eggs a couple weeks after she hatched. she is about 1-2 weeks older than the situation happening in the main hive. Since I have an extra new queen on hand, I decided to allow the Game of Thrones to play out. While brutal, it’s entirely natural. It’s what honey bees do. So, I closed up the beehive, crossed my fingers, and planned to check on them the following week. If it went poorly, I could move the Nuc queen into the main hive – that was my backup plan.
Worker bees only live for about a month, so the beehive population will naturally decline as no new bees are born and the old bees die. I was concerned about the colony declining over the next weeks. As of yesterday, the population is still booming, but I expect it to go down. Unfortunately, this queen drama will affect my honey harvest. Right now is the time of the year for bees to collect the most nectar and pollen. There are fewer resources later in the summer. So, I will probably collect some honey, but much less than prior years, since I have fewer bees in the hive.
Back to the main hive drama. The following week I found no queen cells, eggs, or live queens in the hive. The bees were acting aggressively, so I didn’t inspect very closely – I could have easily missed seeing new eggs or a queen climbing around. There is a delay in time where the new, victorious queen – if she wasn’t injured during her queen fights – needs to fly out of the beehive to the “drone zone” (which is the actual science term for this), where the male drone bees from multiple beehives congregate and hang out all day in the hopes that they get to mate with the queen. The new queen will mate with something like 100 male drones – killing each one in the process. Savage.
If the queen doesn’t get eaten by a bird or smashed by a windshield, she will return to the beehive, gestate for a couple days, then begin laying eggs for the rest of her life. Queens live on average 2-3 years, sometimes more (which is crazy, because worker females and drones live for 30 days). She will lay about 1,000 eggs per day during the summer months.
So, a lot can go wrong between a new queen hatching and starting to lay eggs. The survival of the entire beehive depends on it. I was crossing my fingers pretty hard. Most beekeepers will skip the uncertainty of this process and purchase a new, laying queen from a bee supplier. They cost on average $45+ depending on the bee variety and shipping costs. However, I was interested to watch how the process played out naturally.
Yesterday evening, I opened the beehive one last time before I intervened. Mathematically, the new queen should be laying eggs by this point. The bees were acting aggressively again (which was probably my doing because I was moving quickly and my smoker wasn’t working well). I carefully plucked one frame from the middle of the beehive, which tends to be where the brood nest is located. There were capped eggs and uncapped larvae! This means eggs were laid between 4-10 days ago! That’s all I needed to see to tell me that the hive is now queen-right (has an egg-laying queen). I closed up the beehive. For further insurance, I added a Nuc brood super to my emergency Nuc (mini-hive), so that hive can grow larger.
Pros for following a natural queen process:
The bees fulfill their natural desire to create a new queen
I experienced the trials, tribulations, and time-frame of naturally forming a new queen
I will learn how this effects my honey production
I saved money from purchasing a new queen
I saved the hassle of introducing a foreign queen to a new hive (they can be attacked and rejected)
Cons for following a natural queen process:
The potential for failure is high
The impact on total honey project can be significant
I am a hobby beekeeper – my beekeeping goals are to experience the process and be a good steward to my bees. Honey production is a fun benefit, and selling honey helps me to fund this hobby. I am not really in it for profit, though I do enjoy it when it happens! That being said, the next few weeks will determine how much honey I am able to harvest this summer. There will be some, but my total will not be the 150 pounds I achieved last year. That’s ok!
And, now I have two beehives with healthy new queens!
P.S. I bottled about half of the honey mead that I created back in January! The rest was put into smaller jugs to continue aging. I also dropped some apple wood into one of the jugs to experiment with flavor. Skal!
The bees are buzzing, happily collecting nectar and pollen from the trees and plants in the area. I enjoy walking to the beehive, and sitting silently in front of the hive for a few minutes. I watch the bees enter and leave. Some exchange something between them, some seem to be sunning themselves. Another drags something from out of the hive and tosses it to the ground. They don’t mind that I’m there – they don’t see me as a threat and they ignore me completely. The pesky mosquitos are the insects that bother me most at the beehive!
What’s happening in the hives? In the past few weeks, I created a “walk away split” from 5 of the extra frames from the main hive, and create a new mini-beehive aka. a “nuc” which is short for nucleus. Two frames had honey, one had pollen, and two had eggs, larvae, and capped brood. I made the sure that the queen was not on those frames. The goal is that the bees will realize that the queen is missing, and they will make an “emergency queen” out of the newly laid eggs. About a month of time has passed, and I’m not sure if a new queen was hatched, but if she did hatch and successfully mate, then there should be new eggs laid by the next time that I check. If not, then I can add another frame of eggs to the nuc, and hope that they start the cycle again. Aside from the questionable queen, the mini hive is full of bees performing their duties as scheduled.
The main hive is very healthy. I intentionally removed 3 brood frames in order to have the hive think that they swarmed – they were getting very crowded with a lot of brood about to hatch. Again, I hope the queen wasn’t on those frames, but I did shake the bees back down into the beehive. I added a shallow frame of pure beeswax sheets – these are to make cut comb honey. Yay! At this point, the comb has been drawn and they are filling them with nectar, but they are still working on capping the honey. Due to the density inside the hive, I decided to add another honey super, this time for extracted honey. I moved the comb honey to above the other super – I hope that this doesn’t stop them from finishing their process, but we’ll see.
I also asked my woodworker friend to make a frame display case to be used at this summer’s county fair. I hope to have a beautiful frame to show. I believe that I will, but only time will tell.
Aside from checking on the queen status in the nuc, this point in the year involves giving the bees the proper space to expand so they can start filling their honey. I will check on them periodically. I expect that the first honey will be ready by mid to late June.
It’s April, and the earliest buds are only starting to emerge. I find myself staring up at the maple trees in front of my house every day – are they open yet? Soon, very soon, I keep thinking. As soon as the maple trees are in bloom, the bees are generally safe until the dandelions open.
The beehive is alive and buzzing. We are in the final stretch before everything blooms – the bees can freeze or starve anytime. So, I’m feeling nervous. However, last week I added a pollen patty and 1:1 sugar water to the beehive. I removed all of the granulated sugar I placed above the frames as an emergency reserve. They now have some resources to get them through until the main pollen and nectar flow. I haven’t taken any photos, because I want the hive open as little as possible to not chill the brood or harm the bees unnecessarily. Photos will need to wait.
It’s still too cold to fully examine the beehive. I can do that once temperatures are solidly in the 50s. And, that should be coming very soon.
This week is the first full week of spring-like temperatures. I’m very thankful that the beehive made it through the winter. And, once the flowers finally open, I will truly feel successful.
The hive is alive and the bees are ready for the flowers and trees to bloom. The maple trees in my front yard are heavy with buds that are about to open – any day now. I am very excited that my bees have, so far, made it through the winter. There are delicate weeks ahead, so I am doing what I can to help them survive.
It is slightly too cold for me to feed them sugar water, I need to wait until the days are mostly above freezing. I did give the bees a slab of sugar in November, and additional granulated sugar on a warm day in late December. This is to supplement the honey they stored to get through the months when nothing is blooming.
On warm days, I walk out to the beehive to observe any signs of life. Lately, the beehive looks almost the same as a warm summer day! The bees are out and about doing orientation flights and whatever else they do outside of the beehive in winter.
The above photo was taken in late February. I can hardly believe it! My goal is to be prepared to give the bees what they need when they need it – and that is largely determined by our weather.
I repainted all of the beehives last week. I choose a reddish shade of brown in the hopes that my beehive blends into the woods. I don’t want to bother my neighbors or the people walking or biking down the road. So far, the bees have never bothered anyone – except the one ComEd guy who walked directly in front of the beehive on a summer day. Tip of advise, don’t walk in front of the hive entrance, or else the bees will accidentally bump into you. Beekeepers approach from the back and the sides.
A few weeks back, I built my comb honey system. I do plan to make one box of honeycomb this year. I hope that I have enough friends, family, and customers to help me eat it. I am also making a plan to “split” my beehive before they get the urge to swarm. Splitting the beehive in two stops the swarm, and gives me another beehive! I plan to use the second hive as a resource – an extra queen, brood frames, honey frames, etc – not the system that I’ve been using that maximizes honey production. We’ll see how that goes.
Today I treated the beehive for varroa mites using the Oxalic Acid Sublimation method. This effectively kills the surface varroa mites, but is a very dangerous operation. Basically, I connect a metal wand to a car battery, shove the wand into the beehive, and superheat the want to vaporize acid into the hive and the surrounding air. Keep in mind, this is in a beehive of thousands of lifv bees. So, to put it mildly, it’s risky. I purchased the proper respirator mask and followed the directions exactly. The bees were fine, and the operation went off without a hitch.
Mostly, I was concerned that someone might walk or drive past me and think that my property was some kind of hazard site. Luckily, no one saw me. I think.
One last project that I’ve been up to is making mead! I have about 7 gallons of mead fermenting in my front hall closet. I used the uncapped honey from the summer – which I can’t sell since it wasn’t shelf stable yet. And, I added jarred honey that had crystallized too quickly. Crystallized honey is perfectly safe to eat, but I don’t want to sell it crystallized. I’ll drink it instead – when it’s ready. This is a big batch. I think that it will need to sit for many months. I’ll update you on it occassionally.
Spring is in the air! I will be checking in on my bees often for pollen coming into the hive. I expect to be a busy beekeeper soon.
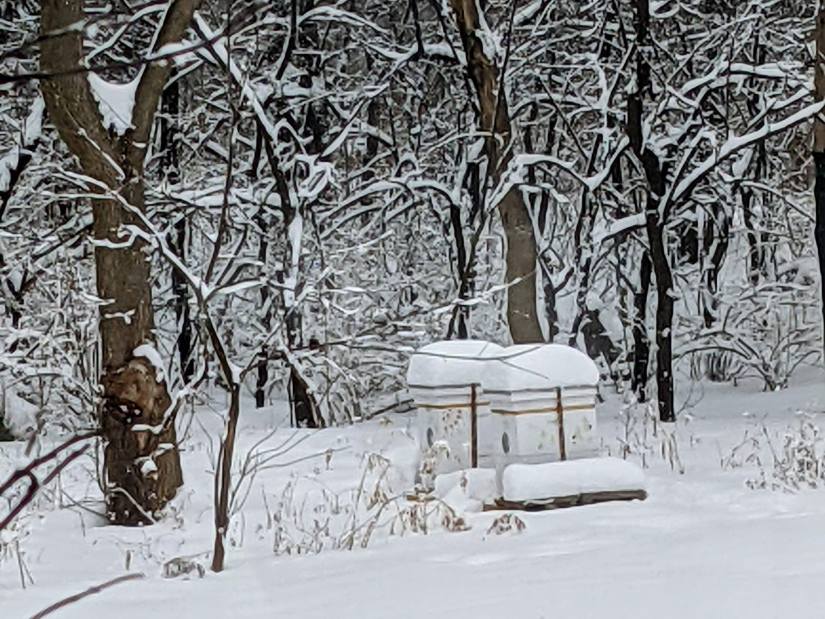
As I write this, a blizzard storms outside of my window. I can see my beehive, which I checked earlier today before the snow began. Today is the Winter Solstice, the first official day of Winter – a very important day in the bee year. Starting today, the day will grow longer and longer, which will trigger for the Queen Bee to begin laying her eggs again. Begin growing the colony for spring.
Right now, there are no eggs – the Queen stopped laying eggs perhaps months ago. Food is scarce. The colony is perfectly balanced to provide enough heat to keep the bees in the hive alive until the weather warms, and the first flowers open in March.
As I type, we are getting a few inches of snow followed by temperatures hovering around 0F for the next week or so. Who knows what the rest of winter will bring. It is, in fact, the first day of winter. The best thing a beekeeper can do right now is hope, plan, and prepare. The beekeeper hopes that they provided their bees enough food to get through winter and provided enough care to manage harmful pests. The beekeeper should plan for the spring – a plan if the bees survive, and one if they don’t. And the beekeeper should prepare new equipment and other items as needed.
My plan for 2023. I do want to continue keeping one beehive. If the bees survive, I will have two hives due to splitting the original. This reduces the bee’s urge to swarm into a new location. It will double my work, but also give me the new challenge of splitting. It will also give me the ideal conditions to produce comb honey – my ultimate 2023 goal. If the bees do not survive, I plan to buy one have and continue the single brood box method. If this is the case, I still plan to try producing one super of comb honey, although admittedly that is not the best circumstance to ask the bees to do so.
In February, I plan to build my new equipment. This may take a few weeks due to my general procrastination when it comes to woodworking. This is also my opportunity to purchase anything else I need for the spring. I feel well stocked at he moment, but I still need to complete my inventory.
I should also make mead. Especially since so much of last year’s honey is crystallizing. It’s a natural process, but I don’t like selling crystallized honey.
In March, if the bees survive, I will be back in the beehive providing food and care as appropriate. If they don’t, I wait for the new bee package to arrive.
The two official honey sales in November were a great success. Everyone who tasted my honey loved it. I also had a lot of interest in my beeswax products. Next year I will make more lotion bars and lip balms. The beeswax wraps were fun, and I can easily hold onto the items that don’t sell.
I look forward to the new year. And today’s daylight will be a just a little bit longer than yesterday. Let that bring hope to the bees that are enduring this storm.
The summer bee season very quickly turned into fall preparations for winter. Much has happened since I last checked in. Honey sales have been going well. I love my porch pickup system, so that I can always be ready when the customer is available to swing by. Honey is available!
The last honey harvest happened right before the Labor Day weekend. I was (too) eager to take the two remaining honey boxes. I made a few sloppy mistakes and got stung in the back of my thigh. Despite the sting, I was determined to finish. The sting seemed typical, and I generally ignored it. But after working in hot, sweaty, and dirty conditions, then going straight to an outdoor concert, sitting on it at work, and driving 7 hours to a lake house, something happened. Let’s just say I needed a few doctors visits and quite a lot of medicine to make it right. Next time I will go slower and make sure to properly clean and care for my stings.
The next week, I swallowed my nerves and placed the varroa mite treatment in the hive. After a couple weeks, I was supposed to take it off the hive. But, the boxes were impossible to pry apart. And, the bees were getting irritated. With the weather turning cold, I let it go. The instructions say it’s ok to leave this treatment in the hive after the treatment cycle. If the bees were already clustering for winter, and it seemed they were, it’s best to leave them alone. So instead, I placed the winter moisture box on top, winches the hive shut, and made their entrance hole small.
I left a full box of last year’s treated honey on the hive, and fed them 2:1 sugar water until the weather got cold. I did my best. Now it’s time to cross my fingers, and occasionally watch them from the outside. Only a few days ago, some bees were still arriving at the hive full of pollen – which looks impossible given that all of the vegetation looks dead for the winter. The bees are smarter than us. Today I watched the hive entrance for a couple minutes. I didn’t see any bees come or go. I think they are fine, but I’ll watch the entrance again in a couple days.
Now it is time to turn to indoor projects. I’m participating in an artisan craft show in early December, so I need to be prepared. I spent this weekend de-crytallizing jars of honey on low in my crock pot. It was a slow process, but worth it. I took care to keep the temps low enough not to harm the honey. Another member of the bee club says that her honey is crystallizing faster than normal too, so something about this year is making the honey go hard fast. Remember, it’s still perfectly good. All you need to do is place it in warm water until it goes back to liquid. Try to keep the water temp between 94-104 for the best results.
I made about 15 beeswax food wraps today. I rendered the beeswax in October, and I have a lot! Beeswax wraps are a fun project, and I am excited to try using them and selling them at the craft fair. I also hope to make fire starters. Here are some photos from when I made the beeswax wraps.
It seems that every surface in our house is sticky. We worked quickly to extract and bottle the first batch of honey – and we finished just in time to submit perfect honey jars to the McHenry County Fair.
Three perfectly filled, identical, clear, one-pound classic glass “Queenline” jars are ready. Tomorrow, I will try my best to gently transport the jars to the honey display at the fair.
All entries must be submitted tomorrow. Judging will occur on Wednesday. The soonest I can check on my entries is Friday. We will see.
Hopefully, I have the honor of taking home the First Place, Blue Ribbon spoils again… $5!
This is me smiling with my beehive before I added *another* heavy honey super
The bees kept me company on this Fourth of July – I had a party with 50,000 of my irritated girlfriends. Today, my goal was to remove one or two honey supers. I thought, with my family out of town, I could leisurely extract honey all week. Unfortunately, that won’t be the case.
I tried something new: a “fume board” to remove bees from the honey super. The bees are bursting at the seams with one brood body and three medium honey supers. The top super was only one week old, and already “looked” full of honey. Feeling excited and confident, I squirted Bee Bandit on my homemade fume board and placed it on top. Sure enough the bees move away from that top super. With a few bees inside, I took it down. I was truly after the next super. So, I used the fume board again.
It was about 85 degrees and humid, and the bees started bearding – to be expected as they move away from the almond scented fume board. But, this time the bees just didn’t move enough. They kept gathering on the edges and bearding near the top. I would need to remove this super the traditional way, but the bearding bees were already agitated. Not wanting to upset them too much, I decided to give them an empty super of partially drawn frame in exchange for the box I’d already removed.
I turned my attention to the super – which I had now moved toward my garage. Angry bees still moved around among the honey frames. But, I smoked them and pulled a few frames to find that none of those honey frames were capped. It was too soon – the honey wasn’t cured enough. Kicking myself, I dragged the honey super full of (now) extra angry bees all the way back to the hive and hefted it all the way to the top of the now extra tall beehive. I’m about 5 ft 8, and this beehive is now about the same height as me. Soon, the beehive will be extremely heavy, and I’m going to have to be the one to take these down.
Smart? Not really. Not for me anyway. The bees are happy again. And, I will potentially have more honey to extract. But, I’m also going to be the one to pull apart an extremely heavy beehive. Needless to say, it will be full of bees.
The final kicker is that I discovered a huge black ant nest in my spare beehive equipment in the shed. I ended my chores by tossing those into the yard and kicking them around until all of the ants and larvae escaped. It was disgusting, but also cathartic.
After a shower and lunch, I also nailed together my two nuc boxes (which I have been staring at in my garage for about a year now). I may try to make a split out of this beehive since it is doing so well – if I can find my way down to the brood box…